
Introduction
The Proxmark 3 is an amazing device for any RFID enthusiast like me, as the possibilities are infinite compared to a regular ACR122 or a SCL3711. It can be purchased from various sellers, but for my Western European fellows, I would recommend Lab401 , I’ve purchased a lot of hardware from them and never had any problems (especially taxes/custom related etc), and their support is great too.
I would like to thank everyone who helped me or inspired me in the doing of this project, names and Twitter accounts will be linked in the article.
The Proxmark 3 RDV4
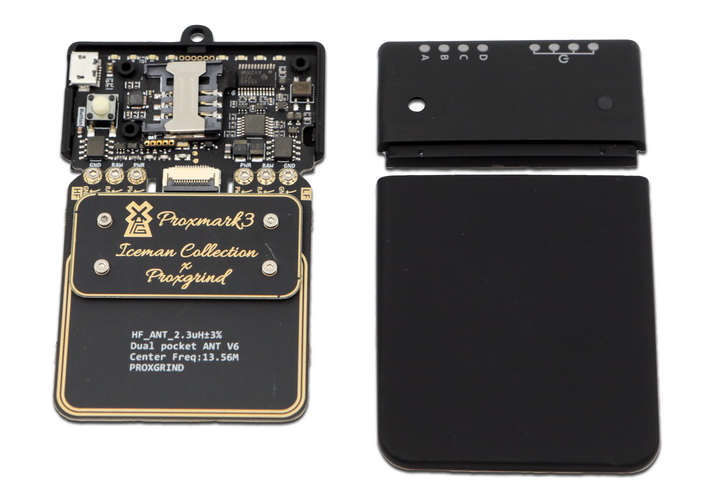
Proxmark 3 RDV4 and its ABS case
- Proxmark 3 RDV4 (allows multi-frequency RFID manipulation)
- Chameleon Mini: RevE Rebooted (a neat tool to use in combination with the Proxmark, the Chameleon can store up to 8 custom NFC tags, but can also snoop and snif communications)
- a SCL-3711 (which is pretty much the same than the ACR122 presented in a previous article, just smaller)
It is important to note that for the rest of this article and for the future ones, I am working exclusively on the RRG/Iceman fork of the Proxmark 3, as some commands/scripts/syntaxes can differ from the original project.
The BlueShark
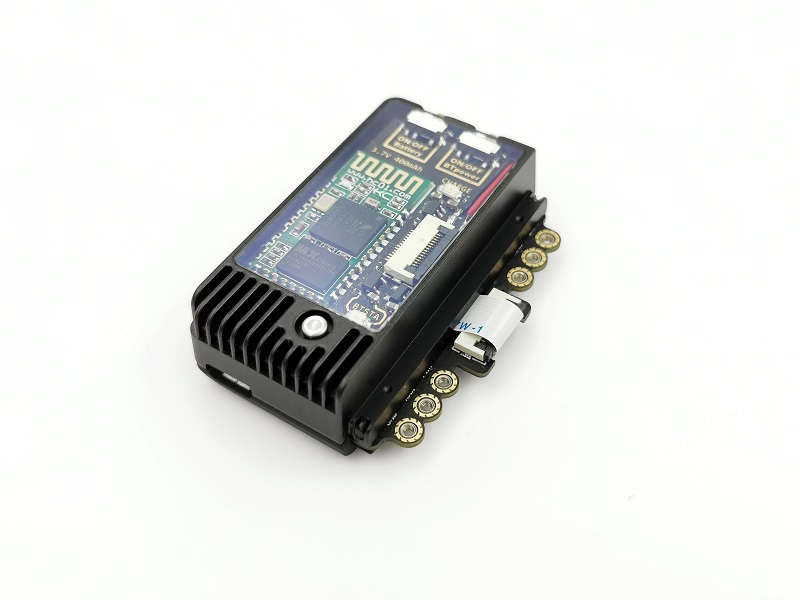
BlueShark
The RFID Research Group and Iceman have released earlier this year an add-on to the PM3 called the Blueshark. This addon was a huge work in progress for some time now (cf Proxmark forums) but it open a whole new lot of possibilites to the PM3 community.
This addon includes:
- Bluetooth 2.0 with EDR module (~6 meters range)
- Built-in 400mAH lithium-ion battery (~3.5 hours in standby)
- Switches to turn on/off the battery or the Bluetooth
A portable PM3
A lot of people from the community were working on different ideas to bring the PM3 to the field ( Luminouw on an ESP32 , Doegox on a RaspberryZero with an OLED hat , TheGrSpy ...) and so I tried to build one from a Raspberry Pi Z and I'll explain here how I did it.
First you'll need:
- a Raspberry Pi Z + MicroSD Card (will act as a MITM);
- an external battery to power up the PiZ;
- a PM3 RDV4 + Blueshark addon;
- any mobile device with WIFI capabilities.
I used a PwnPi ALOA image from Offensive Security ARM Images webpage to have access to a Kali with all of the pentesting tools and binaries onboard in case the project pushes further in the future.
The steps are pretty much straight forward so far, just download your image and use your favorite image flashing tool (I personally use
Balena Etcher
) to flash it on your MicroSD card.
Once your card is ready, plug it in your Raspberry and power it up!
Build your Proxmark 3 framework w/ Bluetooth enabled
Plug your Raspberry to an HDMI display and just follow the steps described on the RRG/Iceman GitHub page as follows:
1/ Update your OS (will take some time) :sudo apt-get update && sudo apt-get upgrade && sudo-apt dist-upgrade
2/ Install dependencies :sudo apt remove modemmanager
3/ Deactivate modemmanager as it will be a huge pain in the *** later :sudo apt remove modemmanager
4/ Clone the project to your PiZ :git clone https://github.com/RfidResearchGroup/proxmark3.git
5/ Inside your project folder, rename the Makefile.platform.sample file to Makefile.platform and decomment the 2 lines about BT_ADDON and STANDALONE mode. It should now look like the following :PLATFORM=PM3RDV4
PLATFORM_EXTRAS=BTADDON
STANDALONE=LF_SAMYRUN
6/ Compile your project (takes some time as well with the not-so-great computing power of a Raspberry Zero) :make clean; make -j8
7/ Plug your PM3 to the Raspberry and flash it either using the flash-all.sh script or the manual command :client/flasher /dev/ttyACM0 -b bootrom/obj/bootrom.elf armsrc/obj/fullimage.elf
NB: If your flashing process went OK, you should now be able to run the framework via USB cable with the following command :./client/proxmark3 /dev/ttyACM0
8/ Now you can unplug your Proxmark and turn the BT and Battery switches on. When your BT blue led is blinking, proceed to the following :pfery@kali:~/proxmark3/client# sudo hcitool scan
ㅤㅤScanning …
ㅤㅤㅤㅤ[...]
ㅤㅤㅤㅤ20:19:05:06:XX:XX PM3_RDV4.0
Note your PM3 address and we will now bind this address to a RFCOMM port of your PiZ :li:~/proxmark3/client# sudo rfcomm bind rfcomm0 20:19:05:06:XX:XX
9/ You can now fire up the Proxmark framework specifying the rfcomm port we just registered :pfery@kali:~/proxmark3# ./client/proxmark3 /dev/rfcomm0
And voilà :
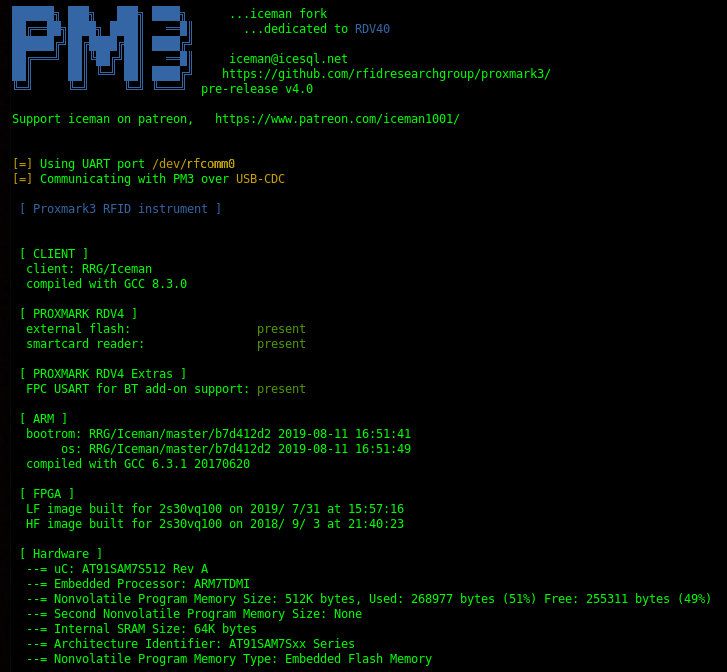
Build your Proxmark 3 framework with Bluetooth enabled
Remotely control your PiZ
Now if we want to get rid of the HDMI display, we have 2 solutions (and it really is a matter of personal preferences here):
- Start a WIFI hotspot from your PiZ and access it via your mobile device;
- Start a WIFI hotspot from your mobile device and setup your PiZ to automatically connect to it.
I went for the first solution but I'll also detail how to do the second as made by Paul on Twitter .
First solution
While we still have our monitor on, install
RaspAP project
.
It's a really easy and user-friendly tool, just create a hotspot with the name you want, and have it start up on boot of your PiZero.
Tip: RaspAP allows you to setup both AP client and server for the future.
Once that is done, connect to the WIFI hotspot with your mobile device and use any SSH Android app (I personally use JuiceSSH on a Nexus 7 running Kali Nethunter distro) to open an SSH session (default ip should be 10.3.141.1).
Second solution
Paul and I worked on the same project but he decided to run the hotspot from his phone and have the PiZ automatically connect to it.
To do that he went through the following steps:
- Attached Pi to laptop using 'middle' microUSB, data, not the power socket.
- Allow a minute or so to boot.
- Browse to http://172.16.0.1:8000/ to change the default AP - password.
- Then created a mobile hotspot on my phone, used the P4wnp1 web interface to connect to it, giving the pi internet access
- Logged into the pi over ssh:
ssh root@172.16.0.1
Here we are, controlling the PM3 from our phones...
Going the extra mile
We both agreed that we didn't want to bother with typing our BT address every time we were firing up an SSH session. Paul decided to create a short bash script and I just added an alias to my .bashrc file.
It simply looks like that:
alias pm='sudo rfcomm bind rfcomm1 20:19:05:06:XX:XX && /home/pi/proxmark3/client/proxmark3 /dev/rfcomm1'
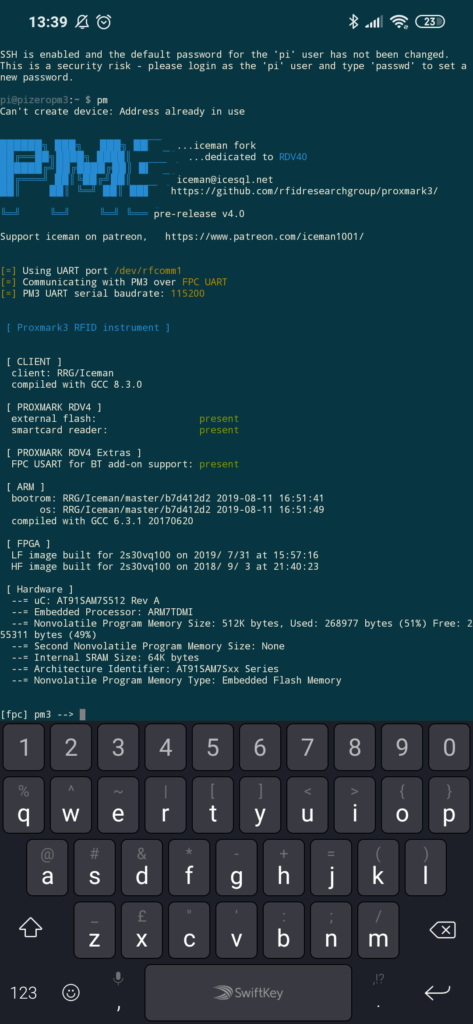
So now every time I simply type pm my whole PM3 client is starting and working like a charm.
The end result
We now have a ready-to-go Raspberry Pi Zero that will either start a WIFI hotspot or connect to our favorite hotspot, and through the JuiceSSH Android app we are one click away from logging onto it.
Once logged in, we only have to launch a script or type our aliases to start the Proxmark3 framework and start cracking some keys!
The end result looks like that (and easily fits in a jean pocket if you use a smartphone and not a tablet) :
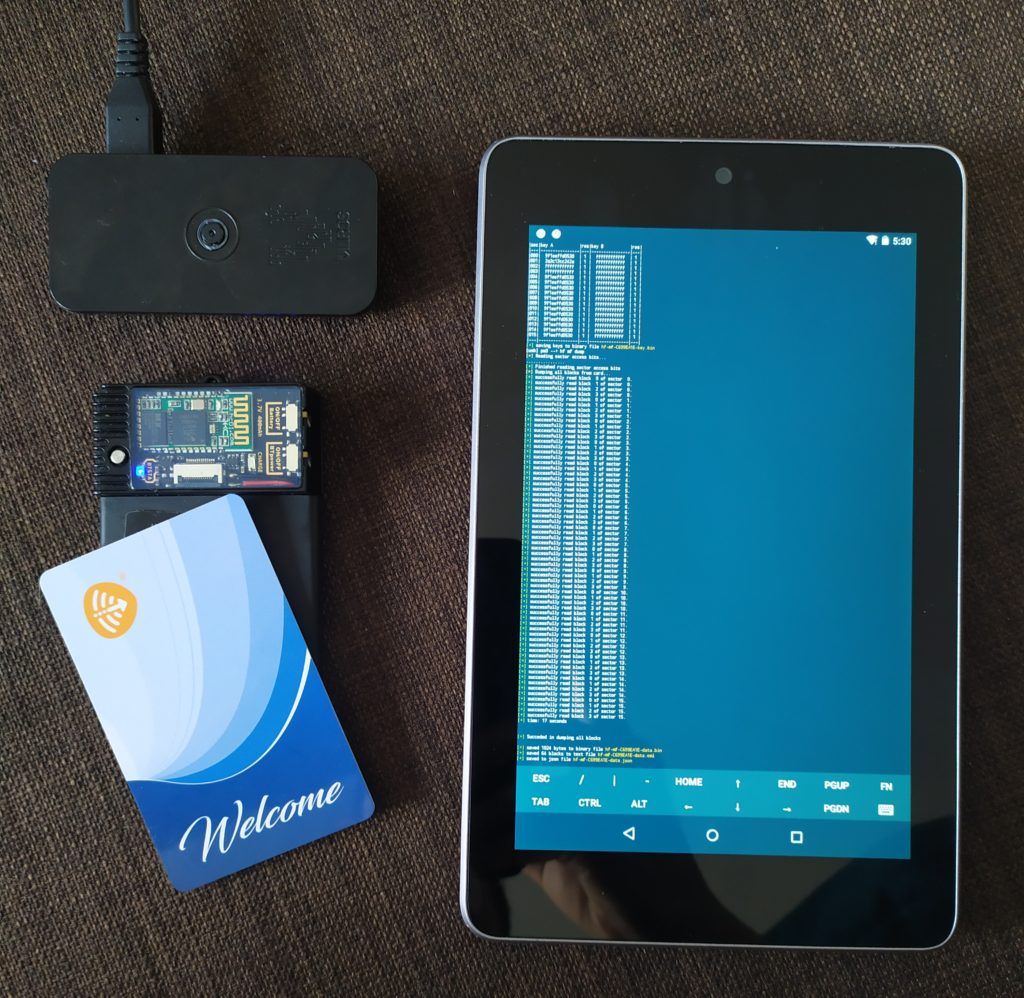
Cracking some hotel room key from my phone/tablet!
See you soon for some field testing of this setup! :)
Originally posted on https://pfery.com/